
As you may have noticed, I am changing a few things around on here, and going in a slightly different direction. Hopefully I will be posting more often!
Author: Jacky
Something Old, Something New!
So last week my lovely parents were in town visiting, which gave me the chance to go grocery shopping with my mom. Which I love, because she is the one that inspires me to be adventurous with food. Anyways, we went to a local grocery store for some dessert options for a party, and happened to meander by the produce section and found some fiddlehead ferns and Mini Colored Potatoes. Now, before this recipe, I had never tried fiddlehead ferns. I did some digging online about them, and at first I was worried that I wouldn’t cook them right and we would a. get sick from them, or b. they would taste horrible. Luckily, it was a success! Mr. Cheesehead and I had the sautéed potatoes (the something old) and the fiddleheads (the something new) with a big old juicy steak!

My goal for preparing this sauté next time is to do so over the grill so they get a nice smoky flavor. Yumyum!

Fiddlehead Ferns with Mini Colored Potatoes
Ingredients:
1 lb mini colored potatoes, cut in half/quarters
8-10 oz fiddlehead ferns
2 tbsp butter
2 cloves garlic, minced
2 tbsp dried onion (you could also use fresh diced onion, I was just being lazy)
1 tsp paprika
Juice from 1 lemon
Salt and pepper, to taste
Directions:
Melt butter over medium high heat in a sauté pan. Once melted add in garlic, onion, paprika, and lemon juice. Stir until combined. Add in potatoes and fiddlehead ferns, stirring until everything is coated with the butter mixture. Cook for 15-20 minutes, stirring occasionally, until potatoes are soft.
See, look at that big beefy steak!

Steak: 1
Jacky: 0
I ate about a third of that steak before I admitted defeat. Man, it was amazing through. I love when Mr. Cheesehead grills.

It’s Been Awhile…
But I promise I am back! Wedding planning kinda got away from me this past week, but we do have our rehearsal dinner venue nailed down, along with our favors and guestbook ordered. Phew, we are under 100 days people!
AND THEN we had some lovely guests this weekend and everything just kind of flew by while we were spending some quality time with them.
AND THEN we got invited to go to a Brewers game last minute on Tuesday night. (With awesome seats I might add!) AND they won! The curse is broken!
Now, I am in hardcore clean out the refrigerator mode. We just seem to have random bits of leftovers everywhere, and nothing is seems to go together. I feel like I am on a constant episode of Chopped.
Anyways, I came up with this one based on the fact that I promised Mr. Cheesehead that I would make him his second favorite meal in the world (Buffalo Shrimp)…only to figure out that we do not have any of our favorite buffalo sauce whatsoever (and I did not have time to make some…I will post my recipe for that soon though). It all worked out though, and I think he likes this one (almost) better than the original!

And besides, you can never go wrong with pasta.
Cheesy Spicy Shrimp Pasta with Cauliflower
1 lb raw peeled and deveined shrimp
1/3 cup olive oil
4 garlic cloves, minced
1 tbsp. brown sugar
2 tsp soy sauce
¼ tsp red pepper flakes
½ tsp chili powder
2 cups of cauliflower
2 cups of pasta
¼ cup parmesan cheese
¼ cup gorgonzola cheese
¼ cup chives, for garnish
In a bowl, mix together olive oil, garlic, brown sugar, soy sauce, red pepper flakes, and chili powder. Once blended toss with shrimp and put in plastic bag. Let marinade for at least 30 minutes. Cut cauliflower into bite sized pieces and steam until cooked but not mushy. Cook pasta according to package directions. While pasta is cooking, dump bag of marinated shrimp into a large skillet. Cook on med/high heat for 1-2 minutes on each side. When the shrimp are finished cooking, add in cauliflower and pasta and turn heat to low. Combine together and add both cheeses. Garnish with the chives. Serve and enjoy!
Side Note 1: I adapted this recipe from www.damndelicious.net, which in turn was adapted fromwww.howsweeteats.com (one of my favorite food blogs), how funny!
Side Note 2: I ended up adding the Gorgonzola cheese after I plated, because we have a moldy cheese hater in this household (not naming any names)!

But seriously, how could you hate any type of cheese?
Ha. Just kidding.
Sort of.
Tuesday Twofer
You know that phrase “Shop until you drop!”? Well, I like to live it sometimes. Not such a good idea when you are trying to save for a wedding/house/future, but whatever. I love shopping.
AND I am so lucky to have an awesome shopping companion, especially one that is willing to hold my purse. Yes, I am talking about my awesome fiancé. (I think I am just going to start calling him Mr. Cheesehead now, because it amuses me.) Anyways, we were doing some bumming this weekend and decided to stop at Trader Joe’s…one of my favorite stores! I love all of their fresh produce, and quick meal options. We have this most favorite type of Chinese Orange Chicken that we stock up on, and no joke, I could eat the entire bag (or just drink the sauce straight up with a straw). Don’t judge me. I promise to think of a recipe to use with that stuff to share with you all in the near future! But anyways, back to Trader Joe’s…one this trip, we decided to splurge and try out this Prosciutto stuffed pasta (Mr. Cheesehead loves bacon and anything remotely close to bacon) and I couldn’t wait to put my own twist on it!
The wonderful thing about splurging every once and a while on a fancy store bought pasta (like this one) is that it gives you so much more flexibility when it comes to creating a sauce to go with it. I was inspired by our GIGANTIC sweet potatoes that are just sitting in their basket all cute-like and decided a roasted sweet potato sauce would be the way to go. This turned out to be pretty much a healthy-ish dinner version of a baked potato, with some pasta thrown in…YUM!
And one quick side note:
If you are more of a plain pasta (aka non-stuffed) type of person, or you just want to throw this with any kind of noodle, vegetable, or even chicken/turkey, you can totally go for it! This sauce would be amazing on pretty much anything in my opinion!
Okay…finally on to the recipe!

Sweet Potato Cream Sauce with Trader Joe’s Perline Pasta and Prosciutto
Ingredients:
1 large or 2 small sweet potatoes
2 tbsp. Olive oil
1 cup half and half
3 garlic cloves, minced
1 tbsp. butter
2 tbsp. freshly chopped sage
Salt and pepper, to taste
1 cup shredded Parmesan cheese
Directions:
Now there are two ways to do this first part, baking or microwaving. I decided to microwave mine, mostly because I didn’t have as much time as the baking required.
To Microwave: Scrub and pierce holes in the sweet potatoes using a fork, place on microwave safe plate. Nuke them for 10-12 minutes, on high, until tender, typically only turning once.
To Bake: Scrub and pierce holes in the sweet potatoes, drizzle with olive oil, and wrap in foil. Bake in the oven at 400 degrees for 45 minutes to 1 hour.
When finished, allow to cool a bit and carefully cut potatoes in half lengthwise. Scoop out potato ‘guts’ and place in bowl. Set skins aside. Add half and half and olive oil and mash (or blend) together until becomes a creamy sauce. Set aside. Cook pasta based on lower end of package directions, basically taking out a minute before it becomes al dente, unless you want overcooked pasta! Add sweet potato mixture, garlic, butter, and sage and cook on low until well blended. Add in salt and pepper, based on taste. Mix in ½ cup of the cheese and the pasta and stir until all mixed together. Sprinkle remaining cheese on top and serve immediately.

But wait, there’s more…
Look at this little gem:

Since I didn’t want to waste the skins of the sweet potatoes after I dumped out their warm yummy filling for the sauce, I decided to quick whip up an appetizer too!
I would just like to preface this next recipe by saying I ended up eating more of these than my actual dinner. Oh well, pasta is always an amazing leftover! These were just so dang tasty. They would also be good with a little dollop of sour cream and some chives, but I mowed them down too soon to think of that (or take a picture).
After you have finished scooping out the potato guts quickly mix the following together and it will happily bake even more yumminess into your dinner:
Ingredients:
Pinch of Salt
Olive oil
1 slice of ham or bacon
1 tbsp BBQ sauce
¼ cup shredded cheddar cheese
Directions:
Preheat the oven to 375. Lightly drizzle olive oil and salt onto bottom (skin side) of potatoes and place on pan, skin side down. Combine bacon and BBQ sauce together and spoon into potato skin. Sprinkle cheese on top. Bake for 5-10 minutes depending on size of potato, until cheese gets nice and melty.

One more side note: I really wanted to brag about my GIGANTIC sweet potatoes, but since Mr. Cheesehead and I weren’t actually that hungry, I only made about half of the sauce I was planning on, ergo, I will just have to save the mondo-potatoes for next time! Stay tuned!
Cinco de May…oh its Monday
I love Cinco de Mayo. Most likely because of the massive amounts of tequila involved with this holiday. Not that I can really partake this year. Growing up sucks. So do Mondays.
BUT to alleviate this horrible case of the Mondays’ (or Tuesdays’ since I’m posting this quite late tonight, I apologize) I came up with a solution! Have a margarita anyways! And why not make your own!? It really is a lot more fun that way!
We also had reason to celebrate tonight! While it is not officially our anniversary of our first date, my fiancé and I use Cinco de Mayo to mark the first time sparks flew between us. Awww.
So, in addition to a margarita waiting for him to get home, he also had a nice sparky(spicy) dinner to eat as well…

Hah, no worries I made sure I cut out the seeds before I put them in the salsa (see the link below for the recipe I made tonight). And yes, this is how my kitchen counter normally looks when I cook. I am messy. Just ask my fiancé…or my mom.
Of course, the margarita should also be a fun color. Have you ever had a rainbow margarita? It is essentially every blended flavor of margarita that a restaurant has, all poured into one cup. Personally, I am not a fan of everything together when it comes to a margarita, but I do love me some odd colored drinks (AKA anything blue), but since I was in more of a green mood today I decided to spice my margarita up with a little Midori.
Jacky’s Favorite Cinco Margs
Ingredients:
1 lime
Sea salt
Ice
2 oz tequila
1 oz Midori or other melon liqueur
2 oz Malibu, Malibu Red, or other coconut rum
1 oz Cointreau or Triple Sec
Splash of simple syrup
Splash of Rose’s Lime
Directions:
Slice lime and slide to coat evenly around the rim of a margarita class. Dip in salt spread across a plate. Blend ice, tequila, Midori, Malibu, Cointreau, simple syrup, and Rose’s Lime in blender until reaches desired thickness. (These ingredients can also be poured over crushed ice if you want to skip the blender part.) Pour into glass and squeeze remaining lime and sprinkle a little salt on top. Garnish with another lime wedge. Enjoy!

P.S. If you are looking for some sort of dinner to go with these little gems I highly recommend you try out these amazing tacos over at How Sweet Eats. She has an amazing blog and is part of the reason I was inspired to start my own. We had these for dinner tonight, yum! Recipe Here: Chipolte Lime Shrimp Tacos with Strawberry Salsa
P.P.S. We purchased a new camera tonight! Sooo…look for some improved pictures up on here within the next few days!
Stop! Grilltime!
See what I did there? A little MC Hammer? Maybe?
I know this is my second post today, but I like you guys so much that I just had to. Plus, this is quite possibly the greatest salad I have had in a looong time. And trust me, I know my salads.
ANYWAYS…allergy season has officially started.
And while it is wonderfully amazing that Mother Nature has decided to be nice to us and is slowly moving towards nicer, warmer temperatures, my allergies are not happy. Honestly, I am trying not to complain too much though, especially after the winter we had up here in Wisconsin. Not fun. There might be some snow up there in those northern parts too. Gross.
We did decide to celebrate the occasion though…by grilling out!

I say we because I have yet to get to the Grillmaster level, therefore, my fiancé is always happy to help.
I am seriously really good at lighting the grill though. The last time I did I used our little grill starter the wrong way (aka put paper in the part where the charcoal was supposed to go) and it worked better than ever before!
So there.
I will be THE Grillmaster soon.
Anyways, enough of my nonsense, on to the food!
With a really long title. Because seriously, I didn’t know what to name this delicious feast. I almost axed the goat cheese out of the title, but really, how could I do something so insensitive!?
Ok. For real this time, enough of my rambling…here is the recipe!
Teriyaki Beef Kabobs on a bed of Goat Cheese-Ginger Arugula Salad

Serves: 2-3 Time: 30 minutes Inactive Time: 2 hours
Ingredients:
1 lb beef sirloin, diced
2 cups Teriyaki marinade (I used Trader Joe’s Island Soyaki)
1 cup mushrooms
½ red onion, cut into large pieces
Arugula, as much as desired
¼ cup goat cheese
Ginger dressing (I used Annie’s Naturals Lite Gingerly Vinaigrette)
Directions:
Combine sirloin pieces in a bag with marinade. Refrigerate for 1-2 hours.
Alternate skewering sirloin, mushrooms and onion until all ingredients are used up.
Grill for 5-10 minutes, depending on how done you want your meat, turning occasionally.
Place arugula in salad bowl, remove beef, mushrooms and onion off skewer and place on top. Sprinkle goat cheese and dressing afterwards.

Enjoy and welcome to grill weather!
Note: If you were wondering, some of the kabobs pictured above look like they have pineapple. They do. Someone (who will not be named) does not like mushrooms/onions, so he decided to go the fruit route. Shows how easy it is to substitute something else in!
Moving Northward…Slightly!

I know I posted about Mexican food the other day, so to spice things up (a tiny bit), I am going to post about Southwestern food today! I know you are all so excited! But seriously, this recipe is too great not to post!
I was inspired by a recipe I found on Yummly, from myrecipes.com, and this, my friends, is what I wanted to use those GIGANTIC burrito shells for!
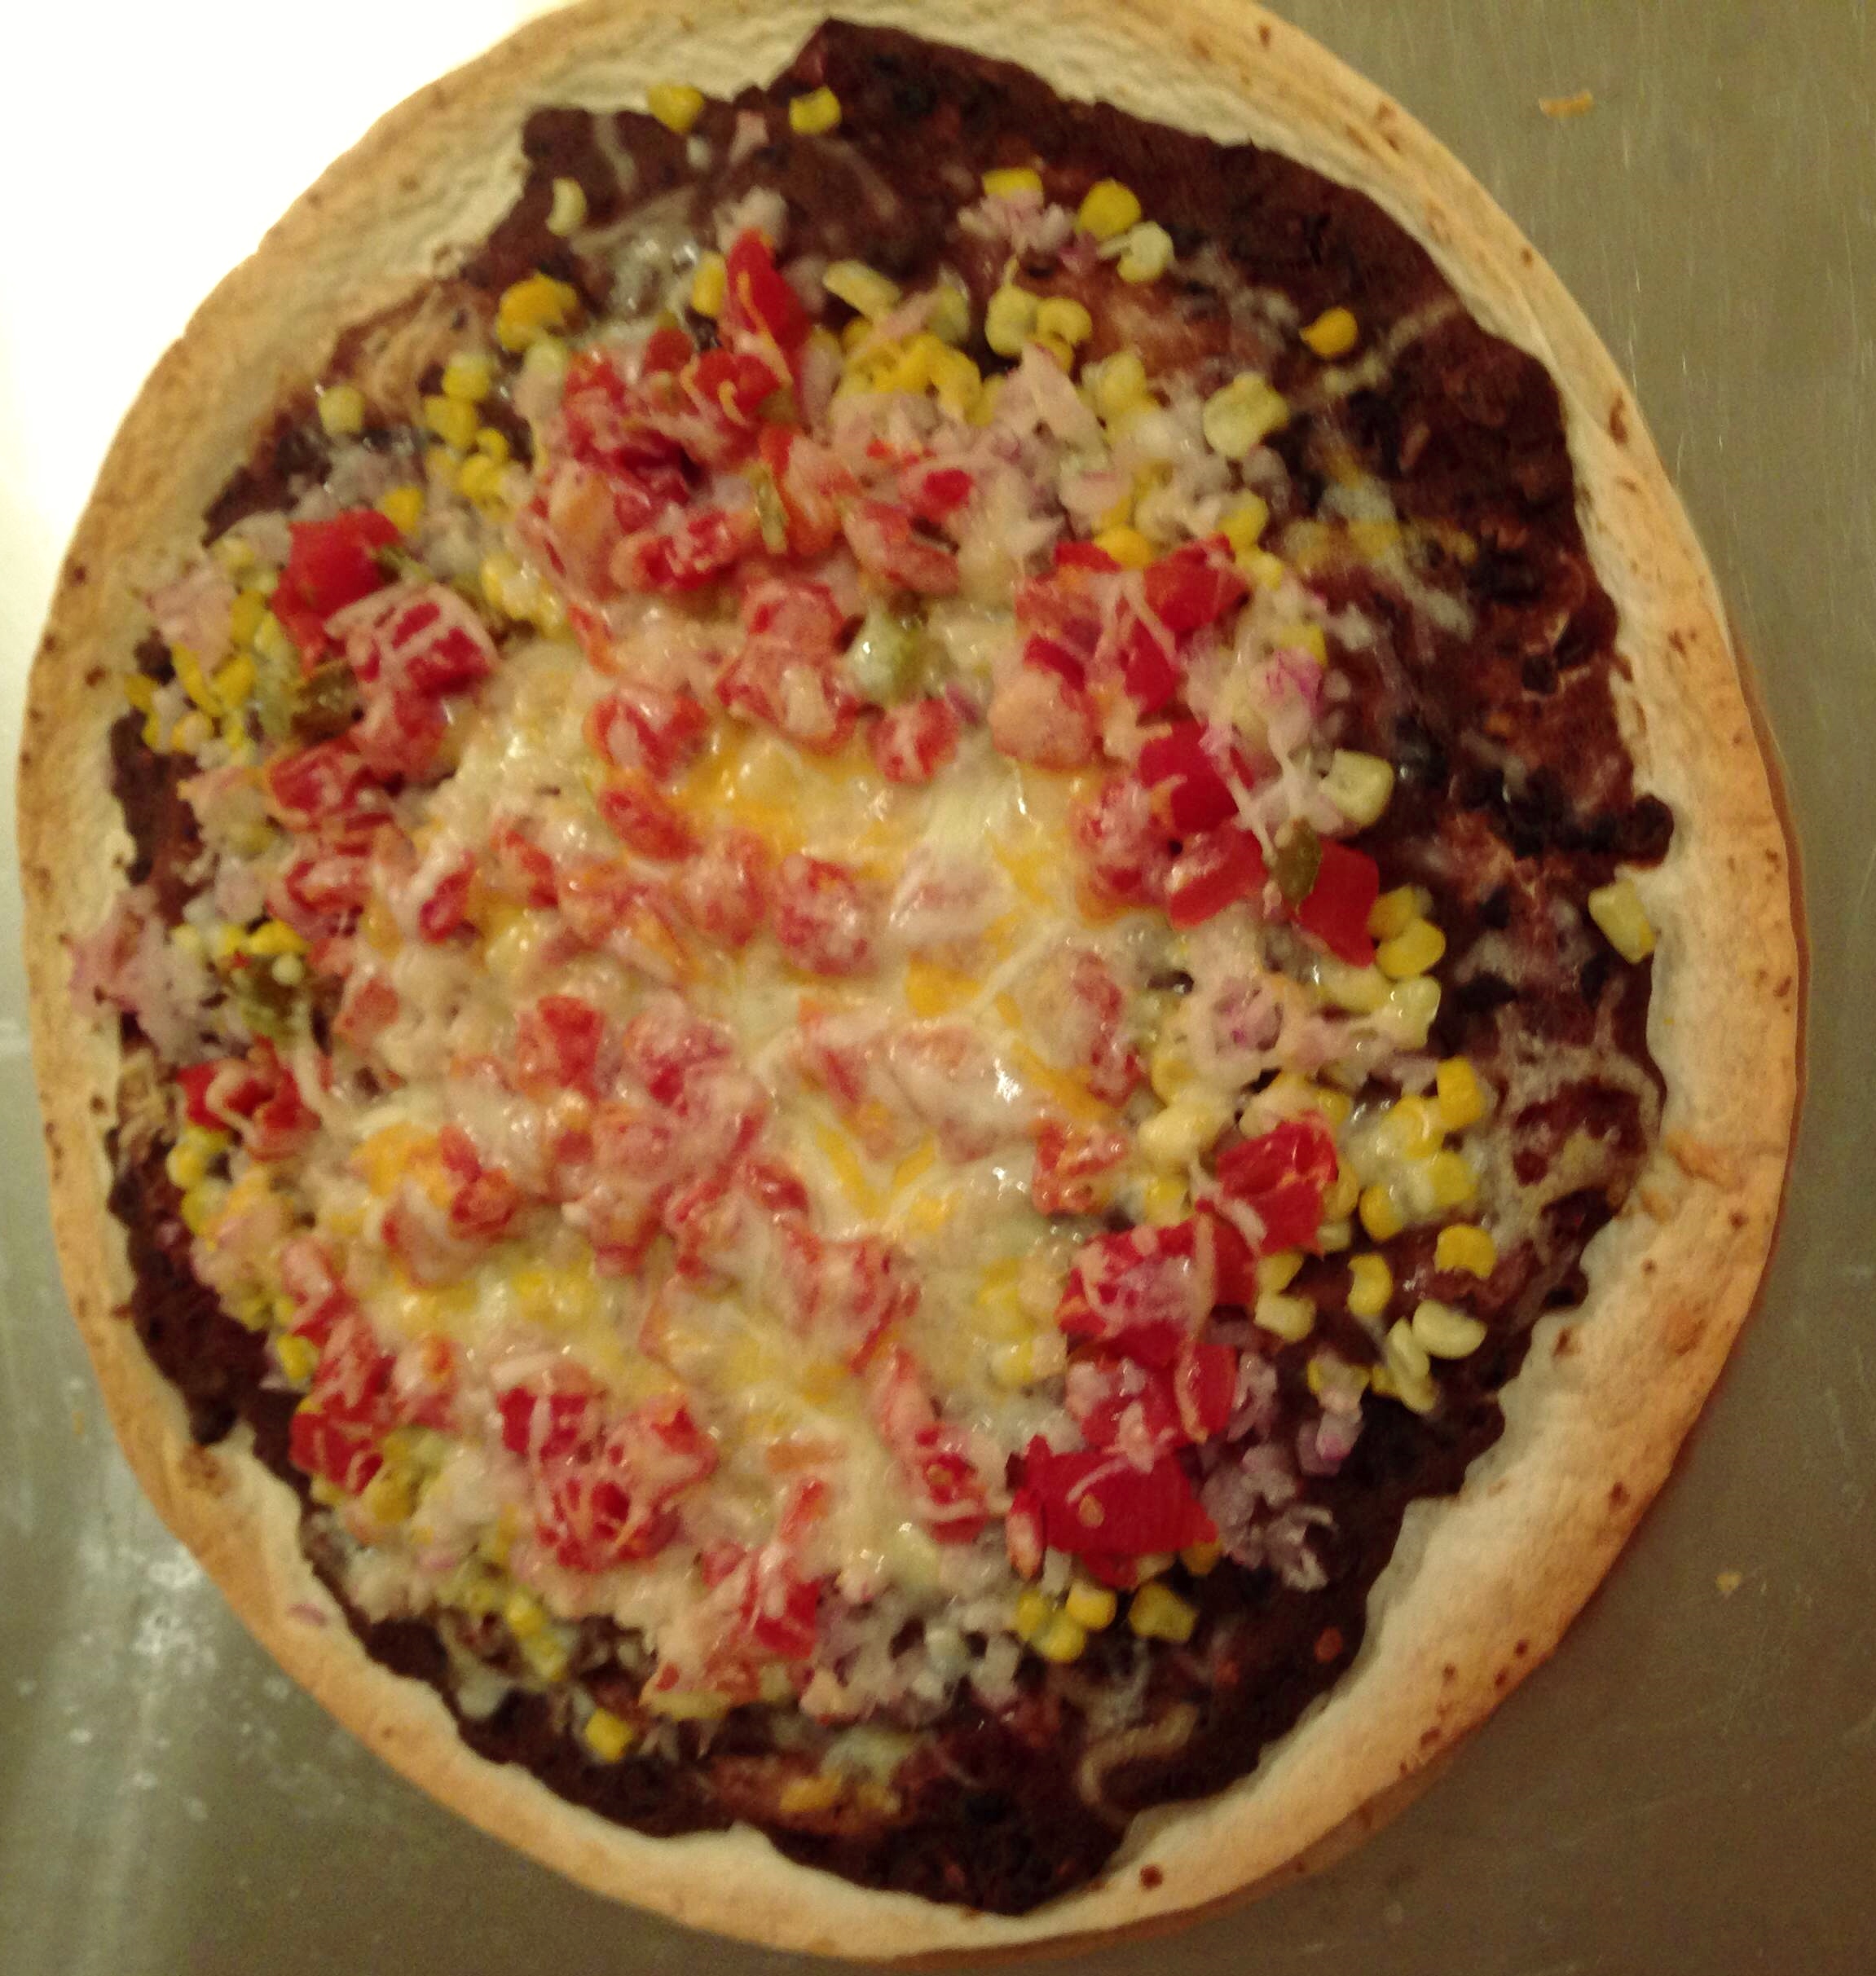
My fiancé and I made these for dinner on Friday night, and I have to admit it was a lot of fun making them together! We ended up getting making two HUGE pizzas and pretty much ate them for breakfast, lunch and dinner for the rest of the weekend. You think I’m kidding, but I’m really not…
Check out this honker! And yes, that is a full-sized cookie sheet it is sitting on.
Look at this bean spread…so amazing!!

And the avocado sauce! I even got the avocado hater in the family to eat it and (maybe possibly) like it a little bit…

Southwestern Pizza with Avocado Drizzle
Serves: 4 Time: 40 minutes
Ingredients:
4 tortillas, as big as you can find em!
1 tbsp olive oil
1 can, Rotel tomatoes, drained.
2 cups frozen corn
½ red onion, diced
Cheddar Jack cheese, shredded
1 can chicken
Shredded cheese
2 avocados
½ cup sour cream
1 lime, freshly squeezed
2 tbsp cilantro
For the Spicy Honey Black Bean Spread:
1 can black beans
3 tbsp olive oil
1-2 Chipotle Chilies in Adobo
2 tbsp honey
1 lime, freshly squeezed
½ tsp cumin
Sea salt, to taste
Directions:
Starting with the bean spread, microwave the can of black beans in a microwave safe bowl for 1 minute. Mash beans with fork until they become paste-like. Add in the remaining ingredients and stir until well blended. Set aside.
Preheat the oven to 400°.
Layer two tortillas out on baking sheet or stone. Lightly brush olive oil on top, and then flip over so olive oil side is down. Sprinkle cheese and chicken on top and then place second shell on top of each. Spread bean paste on top of second shells evenly. Heat corn in microwave safe bowl until corn is partially thawed, but not completely cooked. Add corn, red onion and tomatoes on top of the tortillas. Sprinkle lightly with cheddar jack or comparable cheese.
Bake in the oven for 15-20 minutes or until cheese is bubbly.
Meanwhile, place peeled avocado and mash until somewhat smooth. Add in sour cream, cilantro, and lime juice and stir until well blended.
Remove pizza from oven and let cool for 5 minutes. Drizzle avocado mixture on top, along with additional sour cream and salsa if desired. Enjoy!

YUM.
Taco Thursday and Guacamole with a Twist!
First of all, I know it is not really Thursday anymore, but we ended up doing a bit more wedding planning last night than I bargained for. Second, I am not sure why I find the idea of Tacos on Tuesday and Thursday are so awesome, but seriously, they are. I am 89.99% sure it has to do with the alliteration, but whatever. Cinco de Mayo is also right around the corner…convenient!
My fiancé and I love tacos. And margaritas. There is a little Mexican place down the road from us that we recently discovered and now love! Unfortunately, most of my favorite Mexican cuisine is not the most healthy, which is why a lot of the time we end up eating in to save calories AND money.
One of my most favorite Mexican items (aside from a good old taco) is guacamole. Or guac as I like to call it. And nothing beats making your own homemade guac. (Yes, I know guac doesn’t have cheese in it, but when you put it on a taco, like I am about to do, the cheese on the taco makes up for it!)
I had a little more fun experimenting with this recipe, mostly because I need to go grocery shopping so I was a bit limited on supplies.
Here is my tried and true recipe for making guac, with a twist…

Guacamole
Serves: 4 Prep: 20 mins
Ingredients:
2 ripe avocados, peeled and halved
1 lime or 2 small limes, juiced
½ tsp cayenne pepper
½ tsp red chili flakes
½ tsp ground mustard
½ medium onion, diced
1 ½ tbsp. chopped cilantro
1 clove garlic
7-8 cherry tomatoes (see below)
Sea salt, to taste
Directions:
Mash avocados in a bowl and add in next 7 ingredients. Stir until well blended. Add in cherry tomatoes and stir. Add salt as desired. Serve on top of tacos, with chips, or anything else you can come up with!

So, about those tomatoes…I discovered these little gems at my local grocery store. And they were so delicious! I loved how they really brought a nice, colorful twist to my guacamole.

Here is a look at my taco. It is, of course, sitting on a lovely mound of shredded cheese! And yes, I like hot sauce…a lot, and yes that tortilla is bigger than my head, but I needed larger ones for an upcoming recipe…so stay tuned!
Cheesy Parmesan Crusted Fish Bake (& an Introduction!)
chees·y
ˈCHēzē/
adjective
superlative adjective: cheesiest
1. like cheese in taste, smell, or consistency.
“a pungent, cheesy sauce”
2. informal, cheap, unpleasant, or blatantly inauthentic.
“a big cheesy grin”
Synonyms: tacky, cheap, tawdry; trite; informal: corny, cornball
“those cheesy jokes of hers”
If you Google the word cheesy, this is what you get. Now, I would like to think that this blog of mine will not reflect the tacky or cheap forms of the word, but I guess sometimes things in life do get unpleasant, so maybe this really will define my trials through this journey. C’est la vie!
First, a little bit about myself and my blog…
My fiancé and I are on a quest to eat healthier, not only in for our upcoming wedding, in exactly 108 days (ahhh!), but also for our futures. I have found a lot of healthy cooking inspiration through oodles and oodles of food blogs out on the World Wide Web, and through them I have developed a passion for cooking that I did not know existed. Now, I am on the track to pay it forward, and share my ideas with you, the curious cooks, to inspire and contribute to your own ideas!
Without further ado, on to the first recipe…
This is my fiancé’s favorite dish, which surprised me, since he typically is a red meat and potatoes type of guy. I love it because it is super easy, and does not require a lot of pots and pans. Bonus! I make it with Swai Fish, which I found at my local grocery store and after a bit of digging found that it is a healthy and inexpensive alternative to some other, more expensive fish. I know there is a hot debate between US Catfish and Vietnamese Swai and Basa fish, personally, I like the Swai fish taste and have not had any negative side-effects from eating it. (I am also a recent college graduate, and the price a major factor too; I’ve got loans to pay!) If you are hesitant on trying this fish, you can easily swap it for Catfish or Tilapia.
Also, if you are interested in reading more about Swai and the great debate…here is the article I found most helpful, with links to other resources, including an independent study:
http://www.chefs-resources.com/Is-Vietnamese-Swai-and-Basa-Safe

Sorry! This picture isn’t the best quality…I am still learning how to photograph my food!
Cheesy Parmesan Crusted Fish Bake
Yield: Serves 4 Total Time: 20 minutes
Ingredients:
3-4 Swai fish fillets, thawed if frozen
3/4 cup light mayo (or Lemonaise® or Vegenaise, whatever your preference is)
1 tbsp. Emeril’s Fish Rub seasoning
1 cup Italian Panko Style Bread Crumbs
1/2 cup shredded Parmesan cheese
Directions:
Preheat oven to 425°F. Lightly grease 4.8qt glass baking dish. Remove thawed fish from packaging and lay across pan, trying to keep them from overlapping as much as possible. In a small bowl, mix together mayo and Emeril’s seasoning. Evenly spread mixture over fish. Sprinkle Panko and Parmesan cheese on top of fish.
Bake in oven for 13-15 minutes, or until fish reaches an internal temperature of at least 140°F
Serve immediately and enjoy!
Note: We love to eat this fish with an accompaniment of couscous and sauteed zucchini or steamed broccoli. The couscous and sauteed zucchini are pictured above.
